Introduction (#)

eCosmetics – Beauty & Skincare Shopify Theme 2.0


  • Exclusively provided by Marino Themes

eCosmetics is a clean, modern, and fully customizable Shopify 2.0 theme built for beauty, skincare, cosmetics, beard oil, and wellness stores. Designed with conversion in mind, it features a minimalist layout, fast-loading pages, and powerful built-in tools to deliver a seamless shopping experience.

This theme includes drag-and-drop sections, mobile-optimized design, product quick view, and flexible customization—perfect for beauty brands, perfume shops, and multipurpose stores. Whether you're launching a makeup line, organic skincare, or grooming products, eCosmetics offers the flexibility and performance you need. One-click demo import, SEO-friendly structure, and user-friendly UX make it ideal for both beginners and professionals.

If you need any assistance, we're here to provide full support.
Theme Installation (#)

  • Theme Upload:

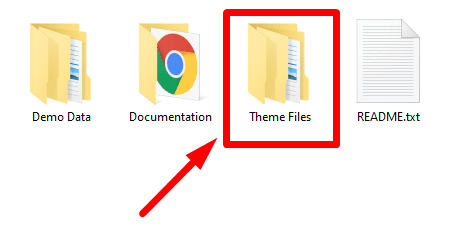
    • Unzip the downloaded file
    • Enter the Theme Files folder
    • Upload the theme file

      Theme upload
      Theme upload
    • From your Shopify admin, go to Online Store > Themes
    • In the Theme library section, click Upload theme
    • From the Upload theme window, click Choose File to select the ZIP file that you want to upload
    • Click Upload. The theme will be added to the Themes page of your admin

Demo Installation (#)

  • Demo Data Upload:

    • Open the downloaded file
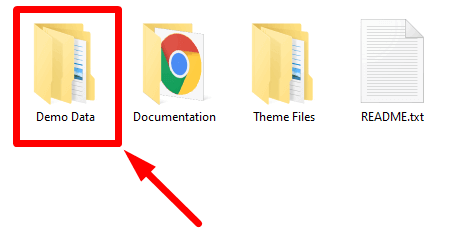
    • Click on the Demo Data > Presets folder, then get all the demo folders
    • Enter the demo folder and select which you want to install
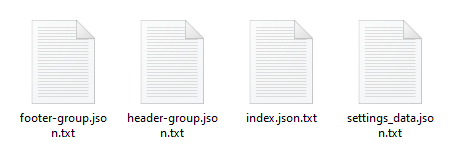
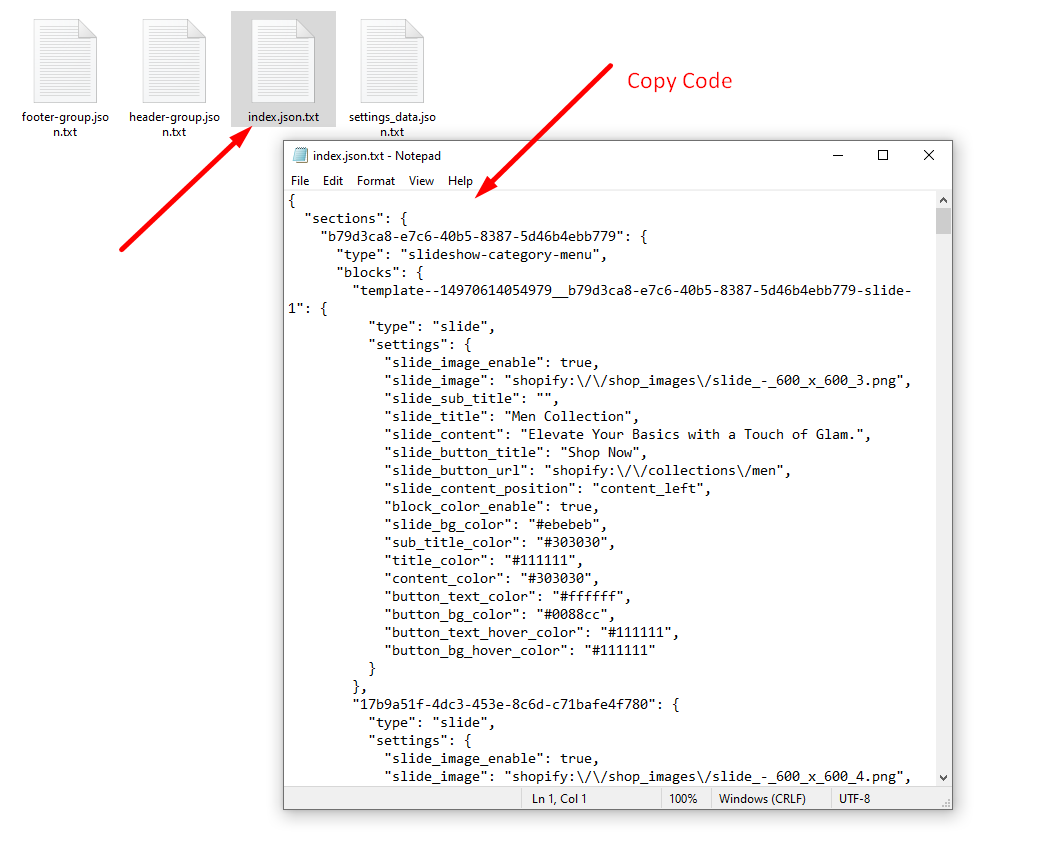
    • Get two files like index.json.txt and settings_data.json.txt

      Demo Installation
      Demo Installation
      Demo Installation
      Demo Installation
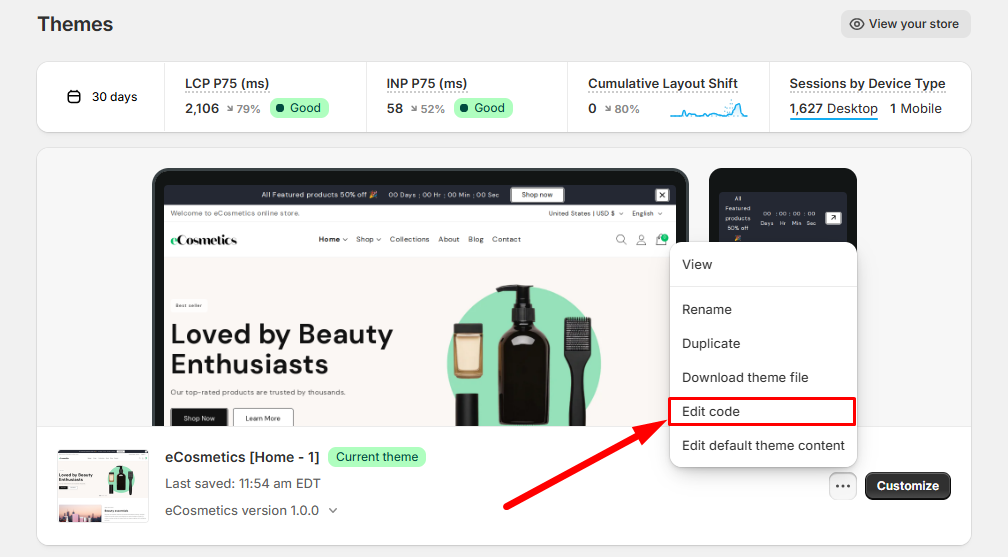
    • From your Shopify admin, go to Online Store > Themes
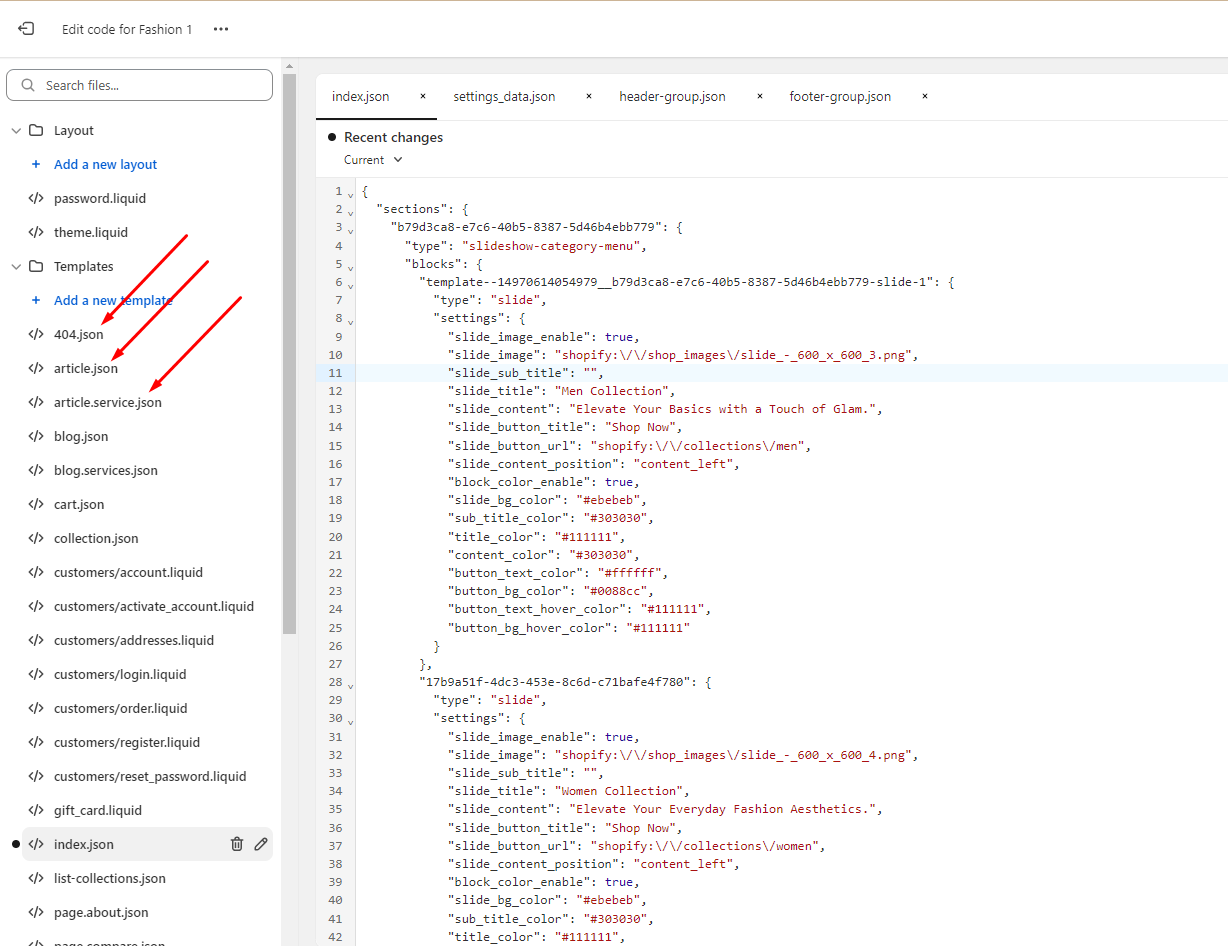
    • Find the theme that you want to edit, and then, click Actions > Edit Code
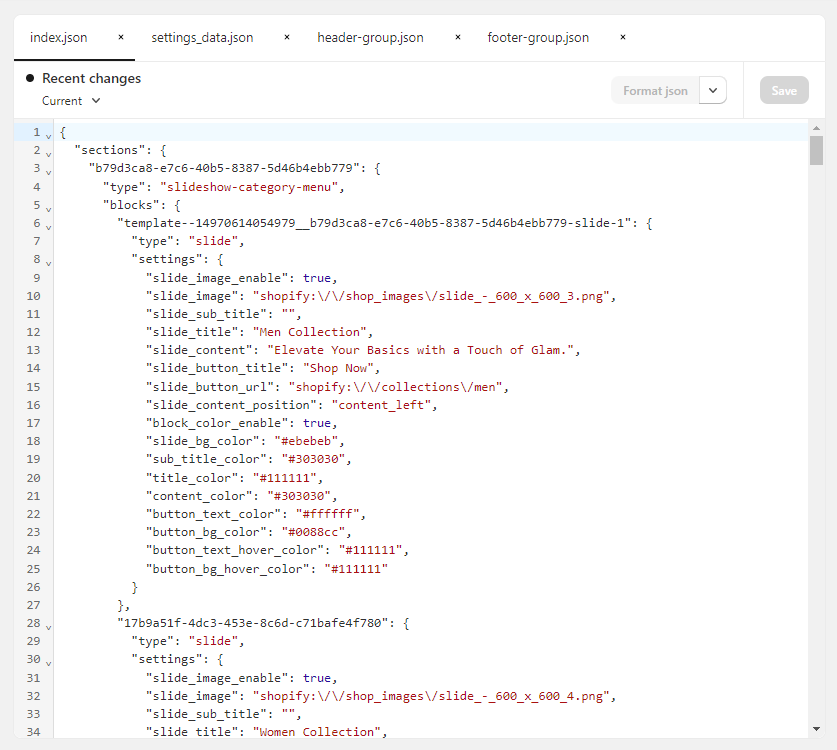
    • Open the index.json, settings_data.json, header-group.json, and footer-group.json file

      Demo Installation
      Demo Installation
    • Copy the index.json.txt code from Presets > Demo file like Home Style - 3
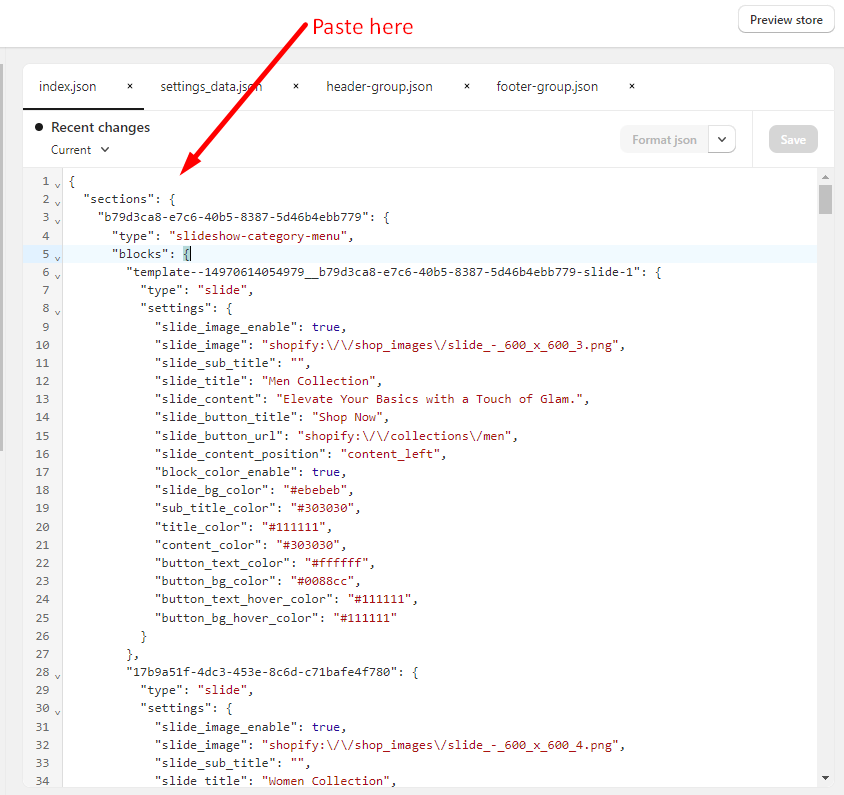
    • Paste it in code editor index.json file and click the Save button

      Demo Installation
      Demo Installation
    • In a same way, copy the settings_data.json, header-group.json, and footer-group.json code and paste it in code editor settings_data.json, header-group.json, and footer-group.json file and click the Save button

Initial Setup (#)

  • Get Ready to Start Selling

    Ready to build your store? With so many ways to use Shopify, getting started can feel overwhelming—and it's easy to worry about missing important steps before your first sale. This section of the Help Center highlights the key tasks to help you launch your Shopify business quickly and confidently.

  • General Settings

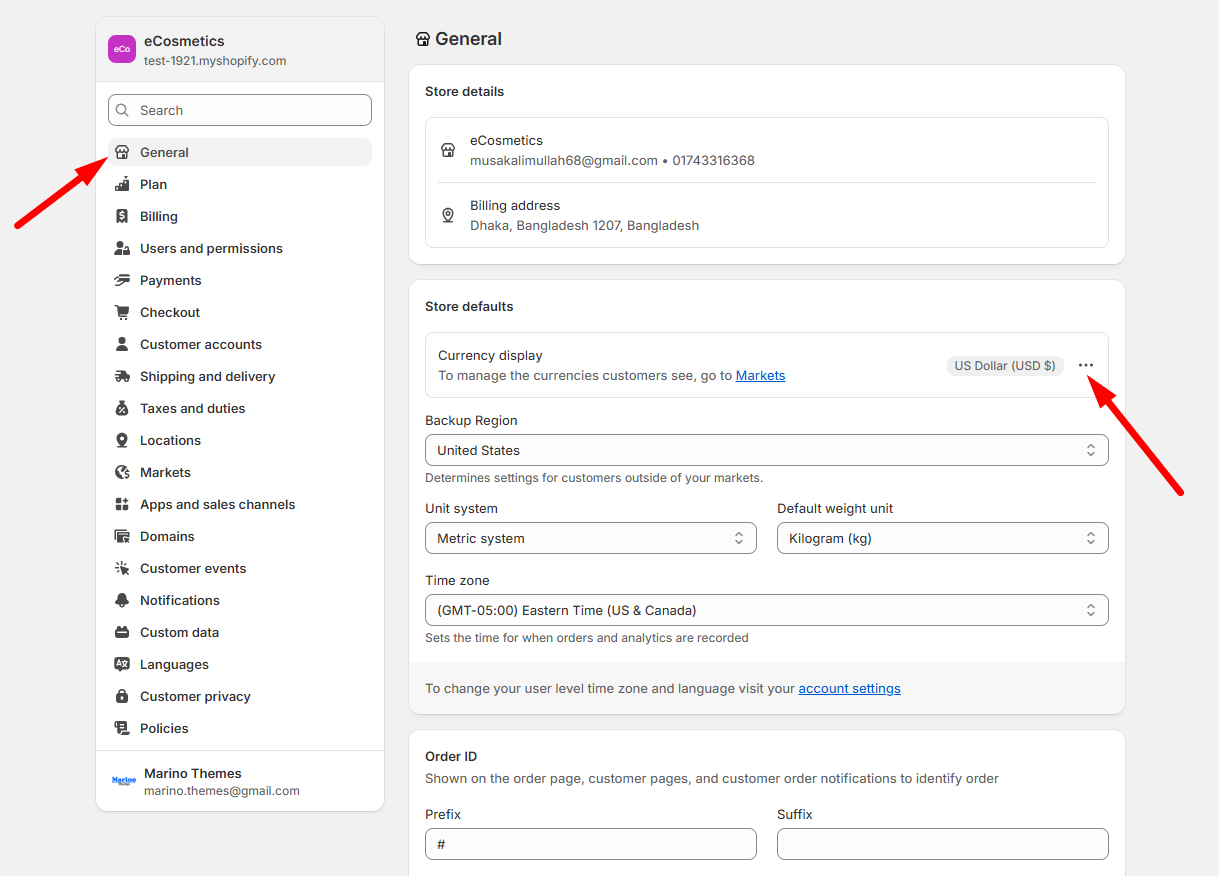
    • From your Shopify admin, go to Settings > General
    • In the Store currency section, choose which currency want to use your store
    • If you want to use Currency picker to your store then replace these below code in the Currency Formatting
      Initial Setup
    • Click Save
  • Customer Accounts

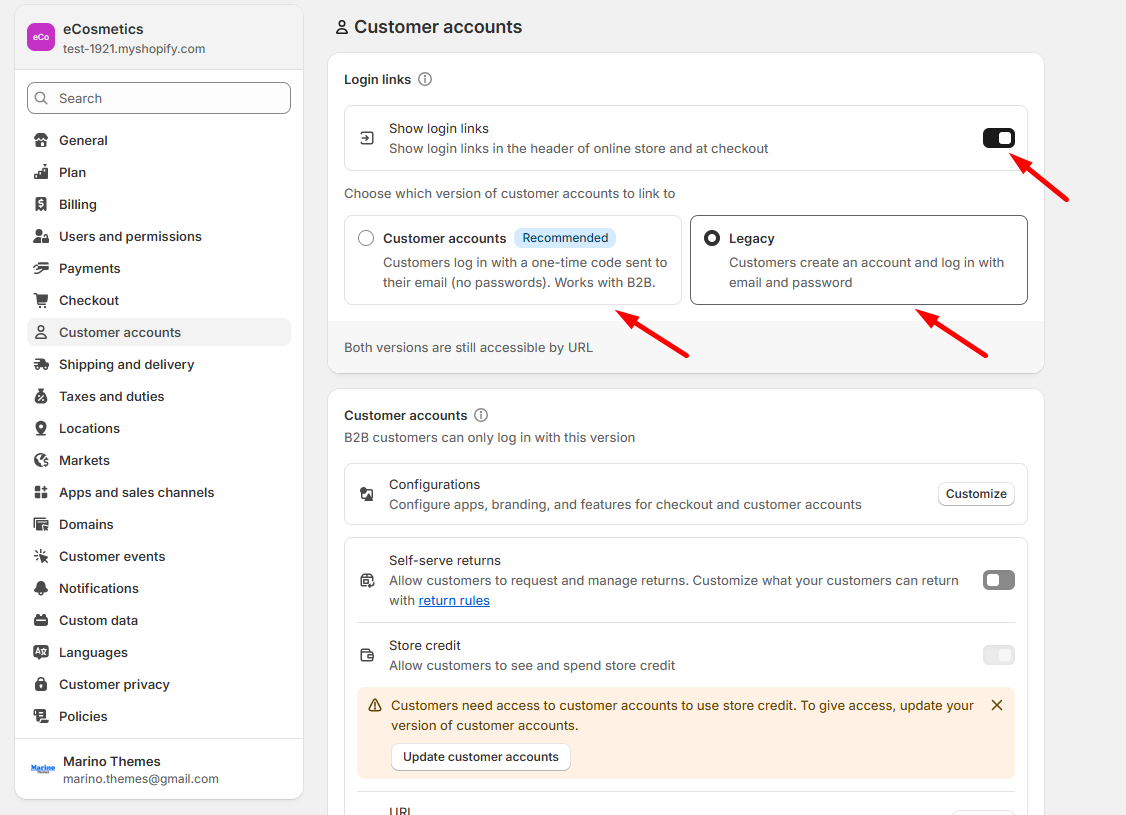
    • From your Shopify admin, go to Settings > Customer accounts
    • In the Customer accounts section, choose the Customer accounts Info or Legacy in customer account option

      Initial Setup
    • Click Save

Theme Update (#)

  • Theme Update (First Way)

    • Upload the updated theme to your store
    • Paste all JSON files codes from the current theme into the updated theme

      Theme update
  • Theme Update (Second Way)

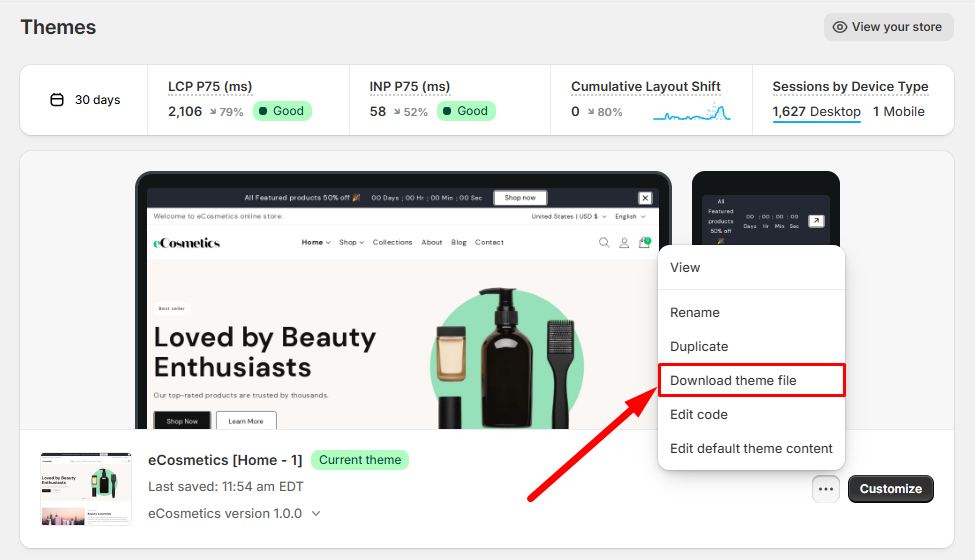
    • Download the current theme from your store

      Theme update
    • Unzip the current theme downloaded file
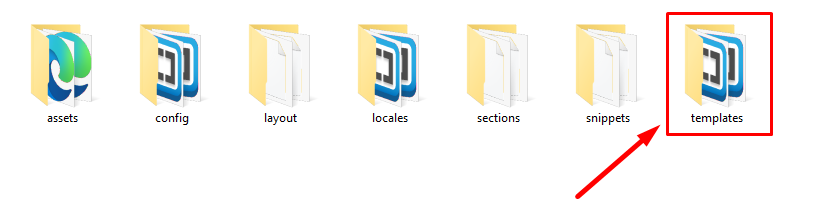
    • Copy the template folder

      Theme update
    • Unzip the updated theme file and replace the template folder in the updated theme file
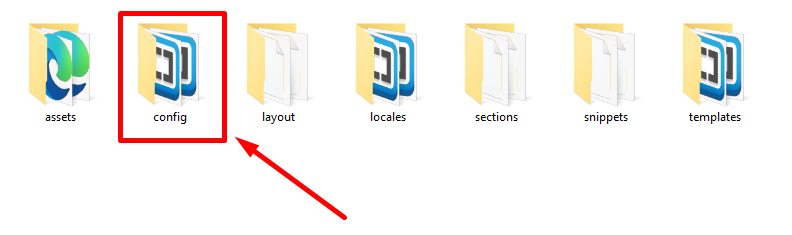
    • Go to the current theme file and enter the config folder

      Theme update
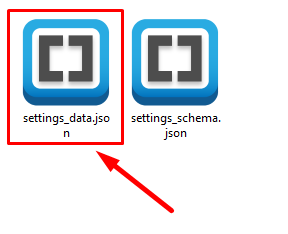
    • Copy the settings_data.json file

      Theme update
    • Replace the settings_data.json file in the config folder of the updated theme file
    • Select all files from the updated theme file and Zip it
    • Upload the updated theme file to your store
    • Finally, publish it

Mega-Menu (#)

  • Create a Mega-Menu

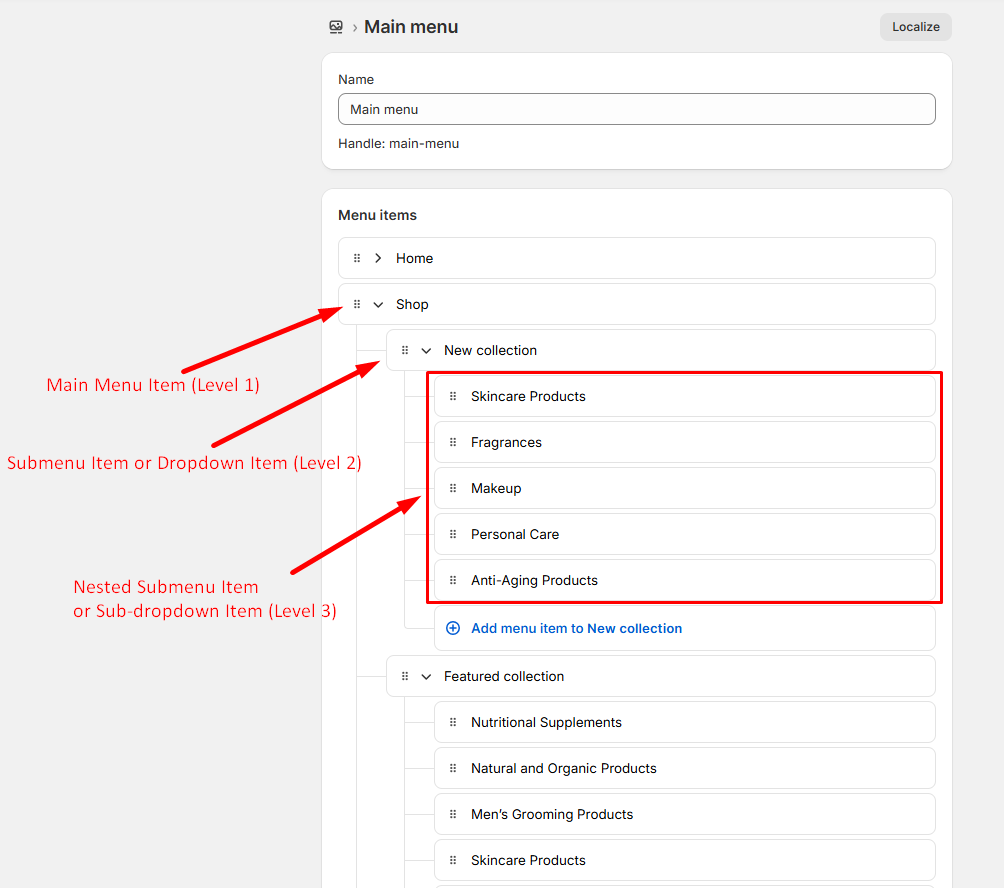
    • From your Shopify admin, go to Online Store > Navigation
    • Click the name of your main menu
    • Choose one of the menu items to be the header for your mega-menu
    • Then add new drop-down menu under the selected menu item
    • Again add new menu items under the drop-down menu

      Navigation
  • Create a Mega-Menu with Image

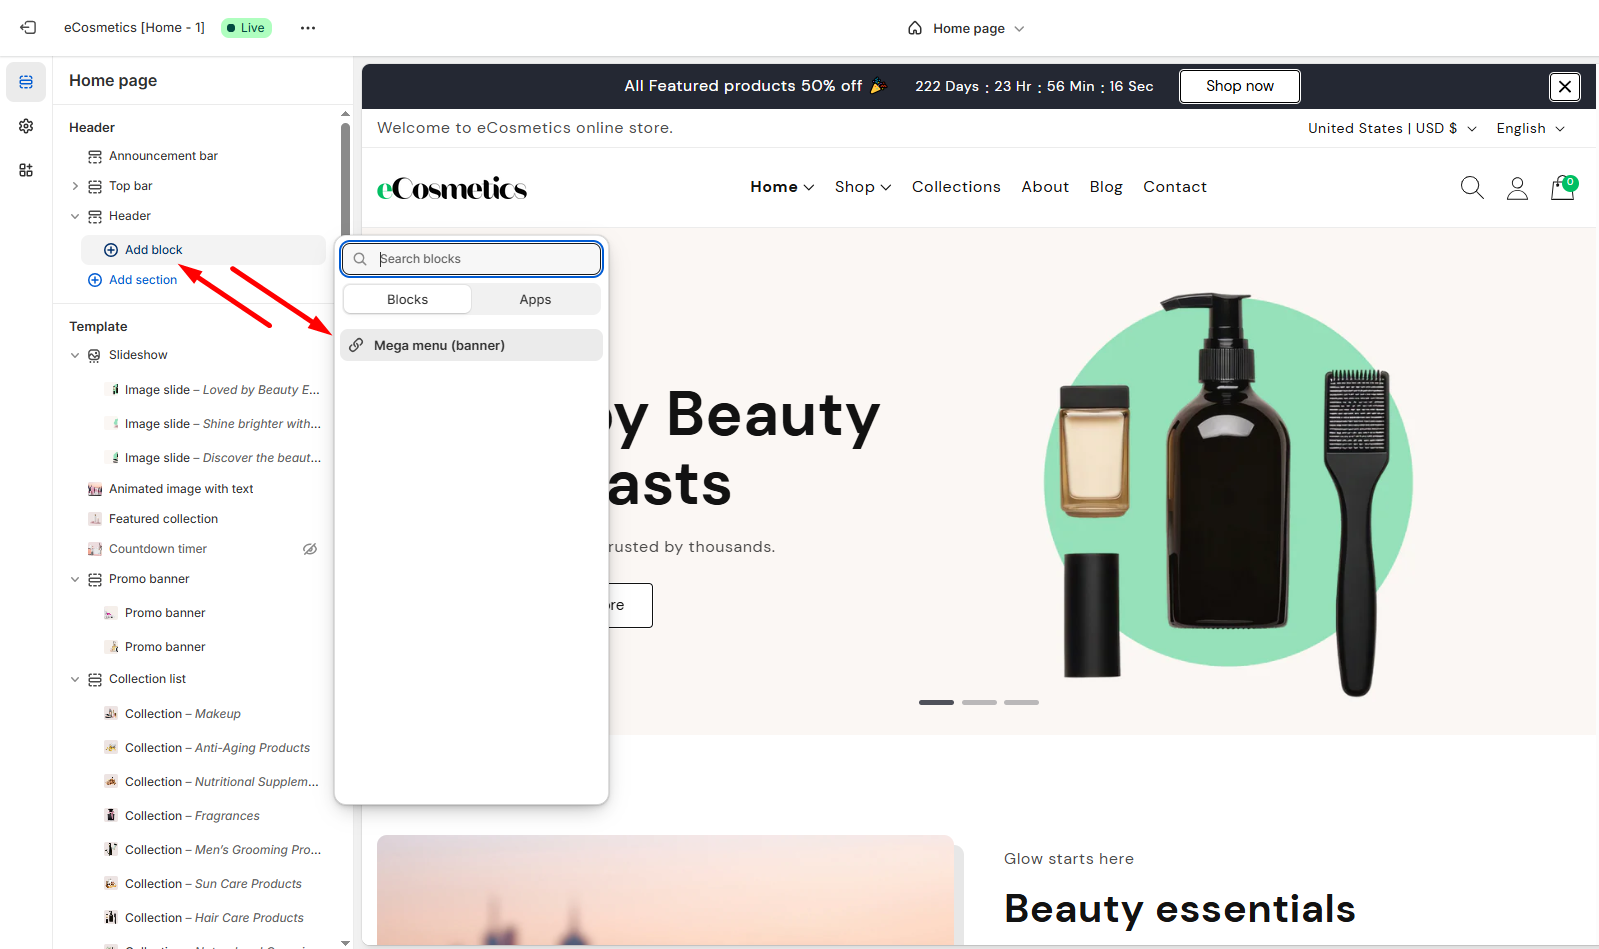
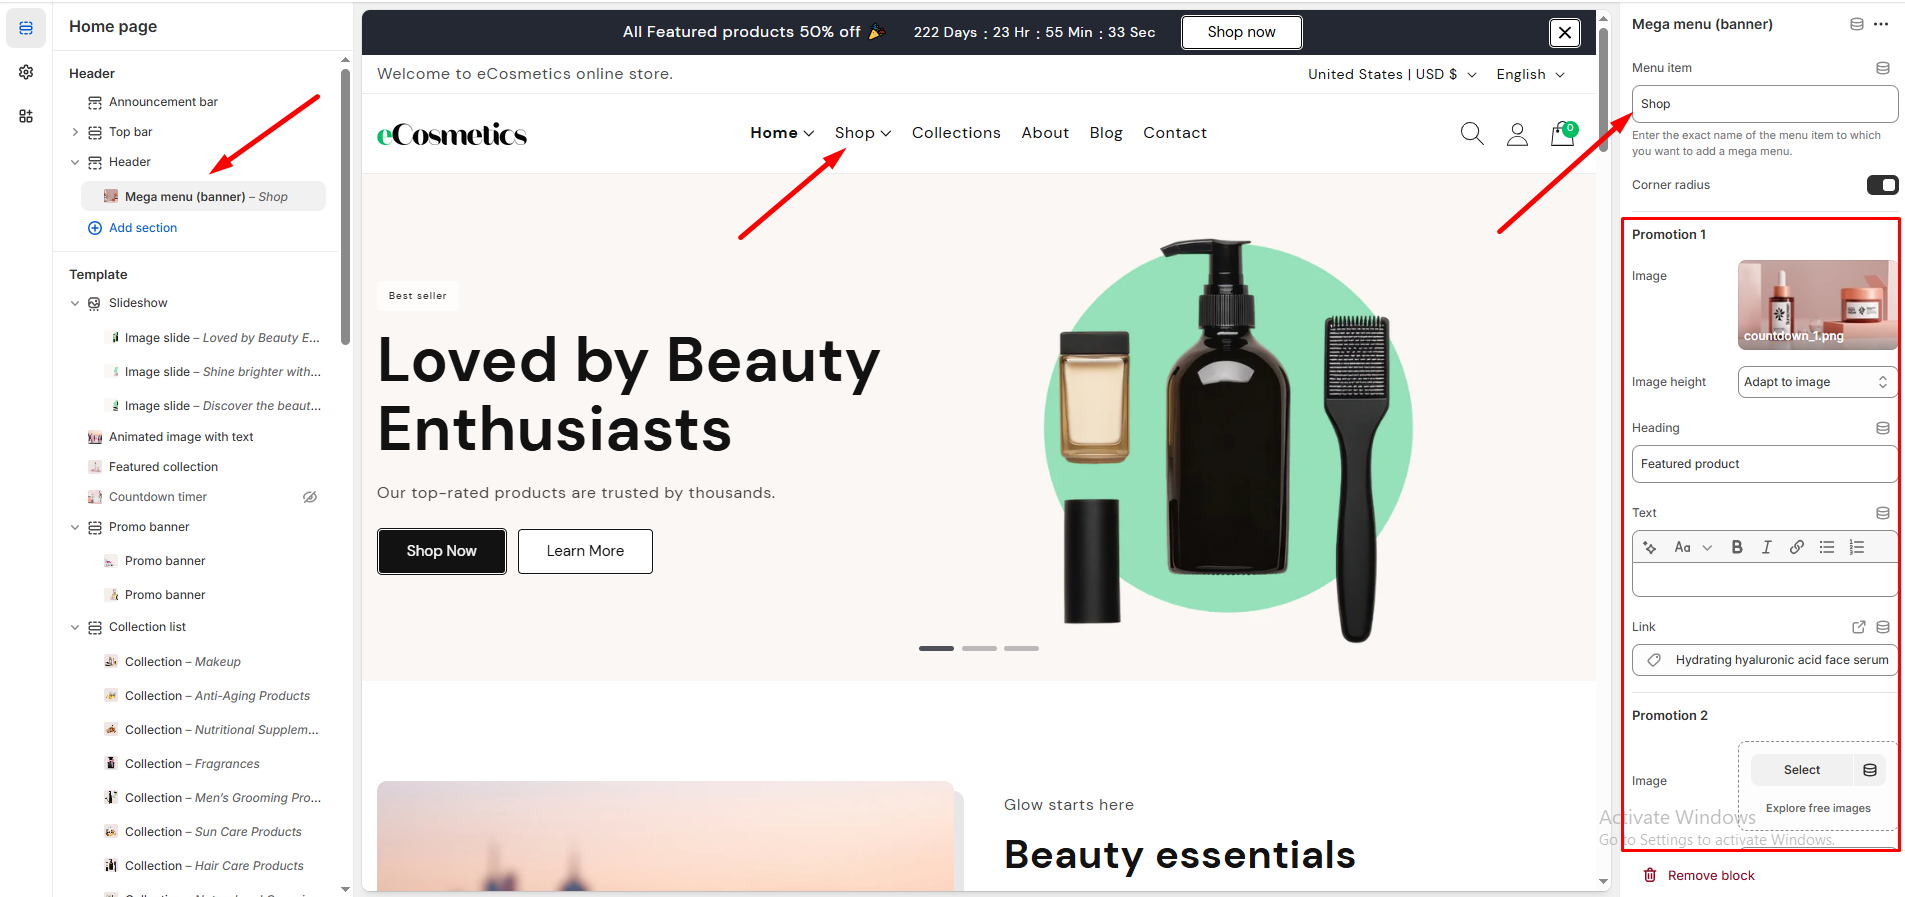
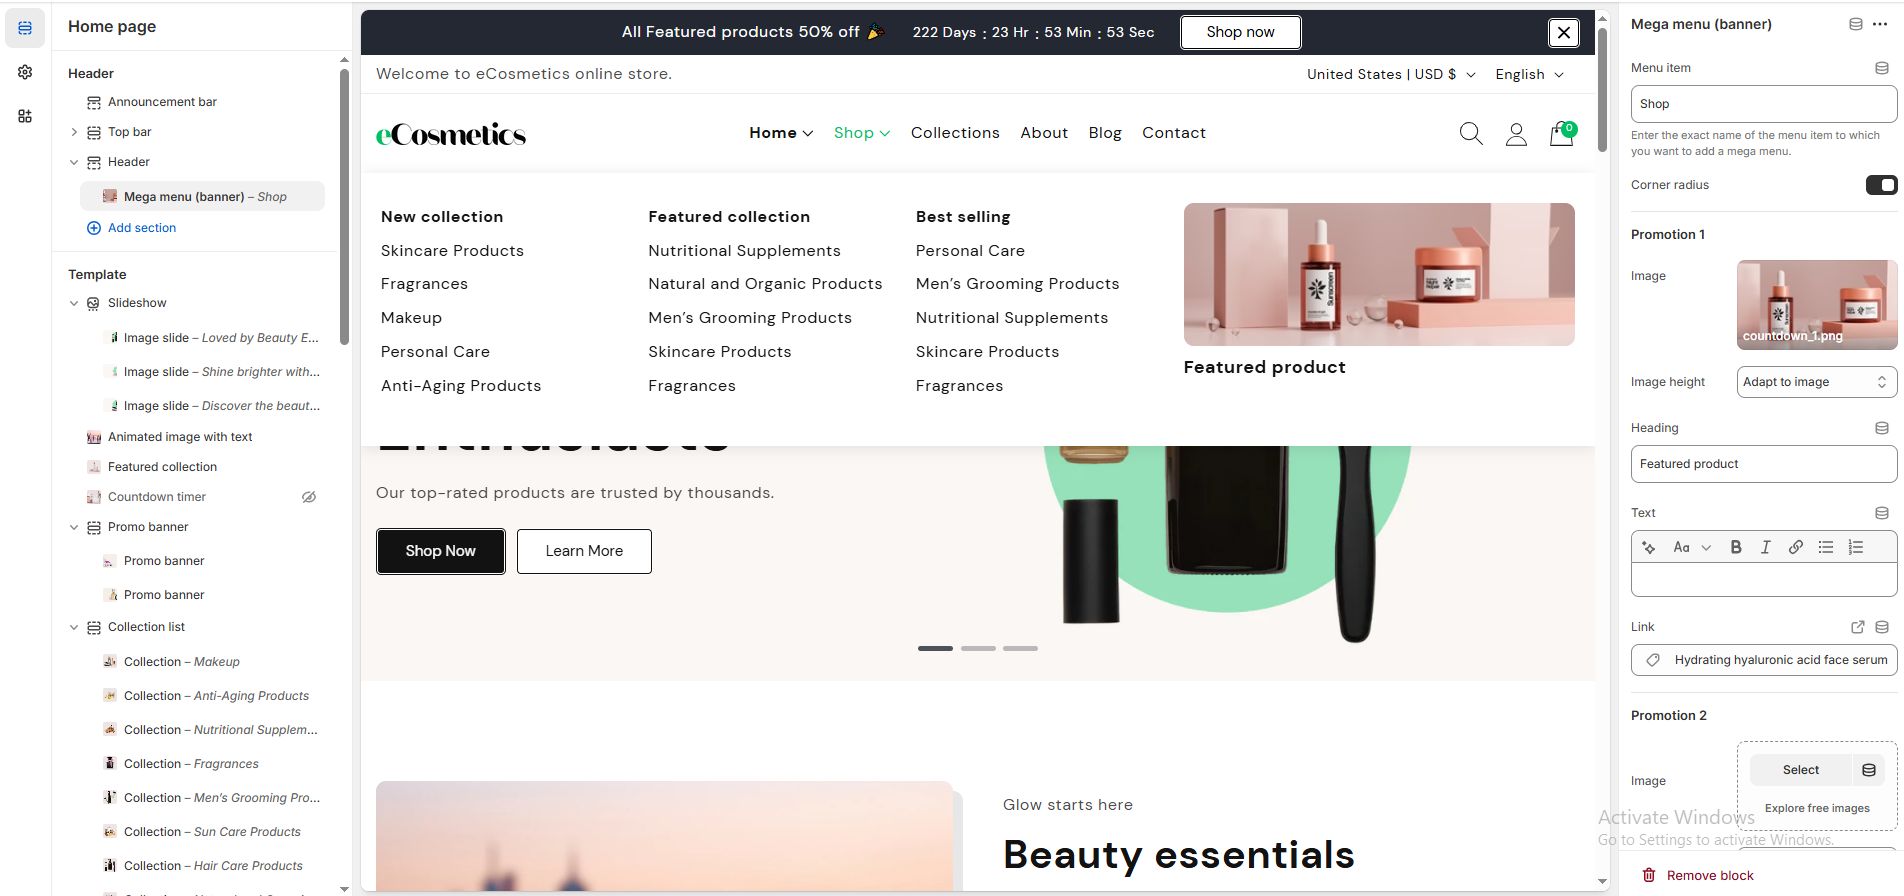
    • Go to Customizer > Header, then add a Mega Menu (Banner) block. In the Menu Item input field, enter the name of the menu item where you want the mega menu to appear. After that, add an image, heading, text, and link as needed.

      Navigation
      Navigation
      Navigation

Adding Products (#)

You can add or update information about a product such as its price, variants, and availability from the Products page in your Shopify admin.
Product image recommended size: 1200 x 1200px

Countdown Metafield (#)

  • Adding Metafield for Product Countdown

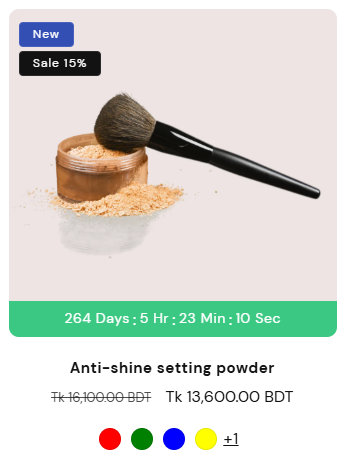
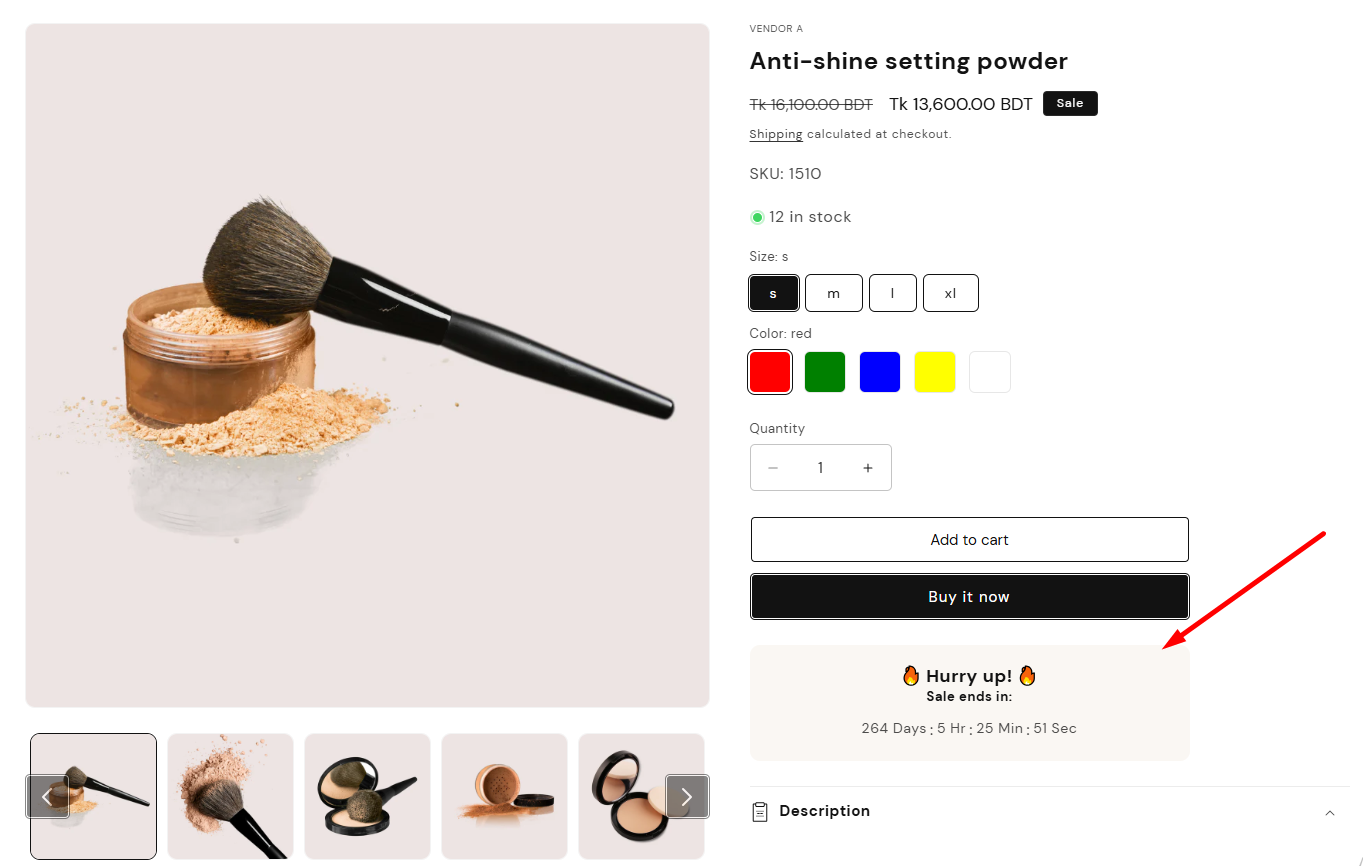
    • To showcase the product Countdown in product grid, use the Metafields

      Metafield
      Metafield
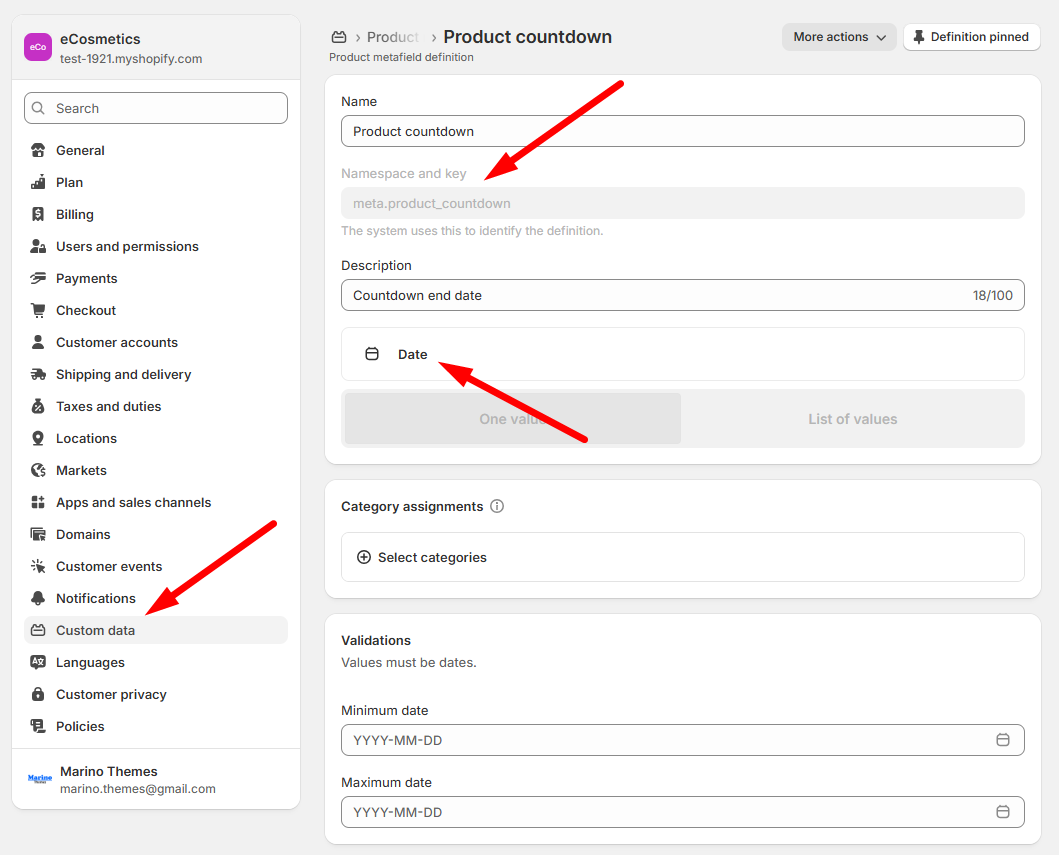
    • From your Shopify admin, go to Settings > Metafields
    • In the Manage metafields section, select the Product
    • Click Add metafield definition
    • Use this code in the Namespace and key field
      Copy

      Metafield
    • Slect content type Date
    • Click Save
  • Adding Metafield value in the selected Product

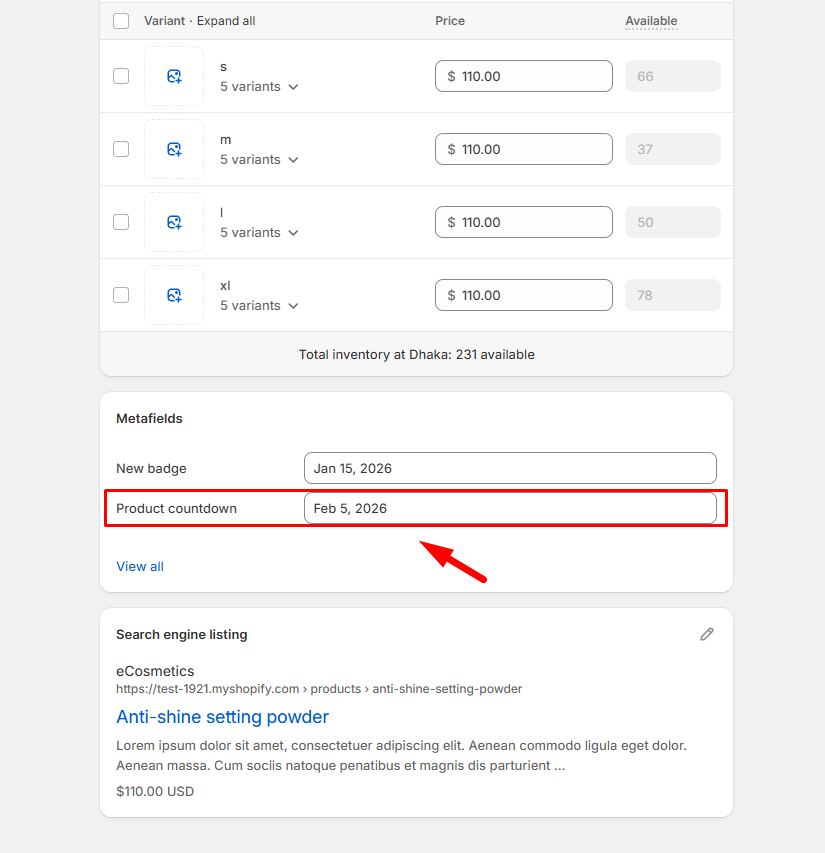
    • From your Shopify admin, go to Product
    • Select the Product which displying the Metafields
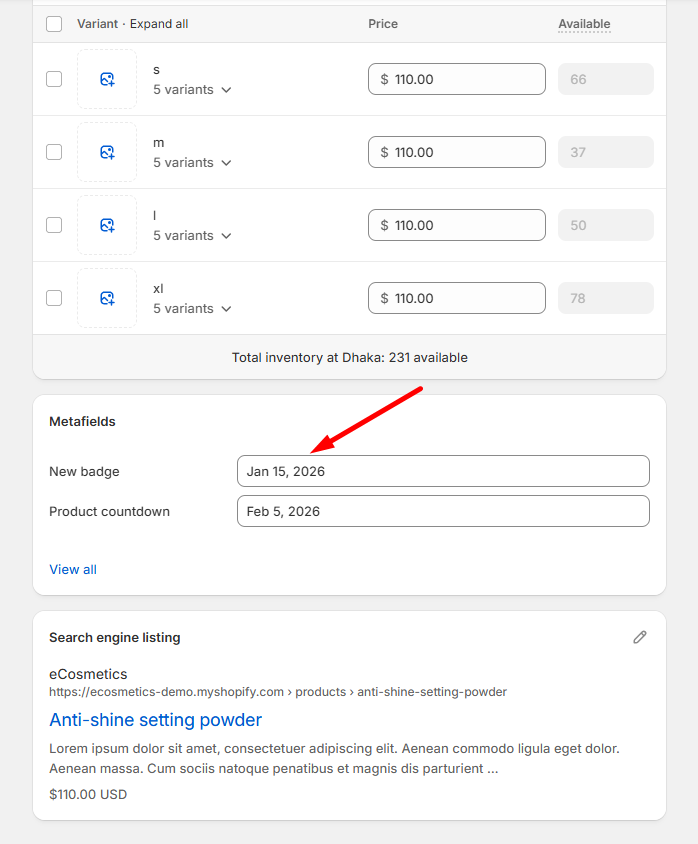
    • After that, get metafield option to add value

      Metafield
    • Set the product countdown ending date

New Badge Metafield (#)

  • Adding Metafield for Product New Badge

    • To showcase the product New badge in product grid, use the Metafields

      Metafield
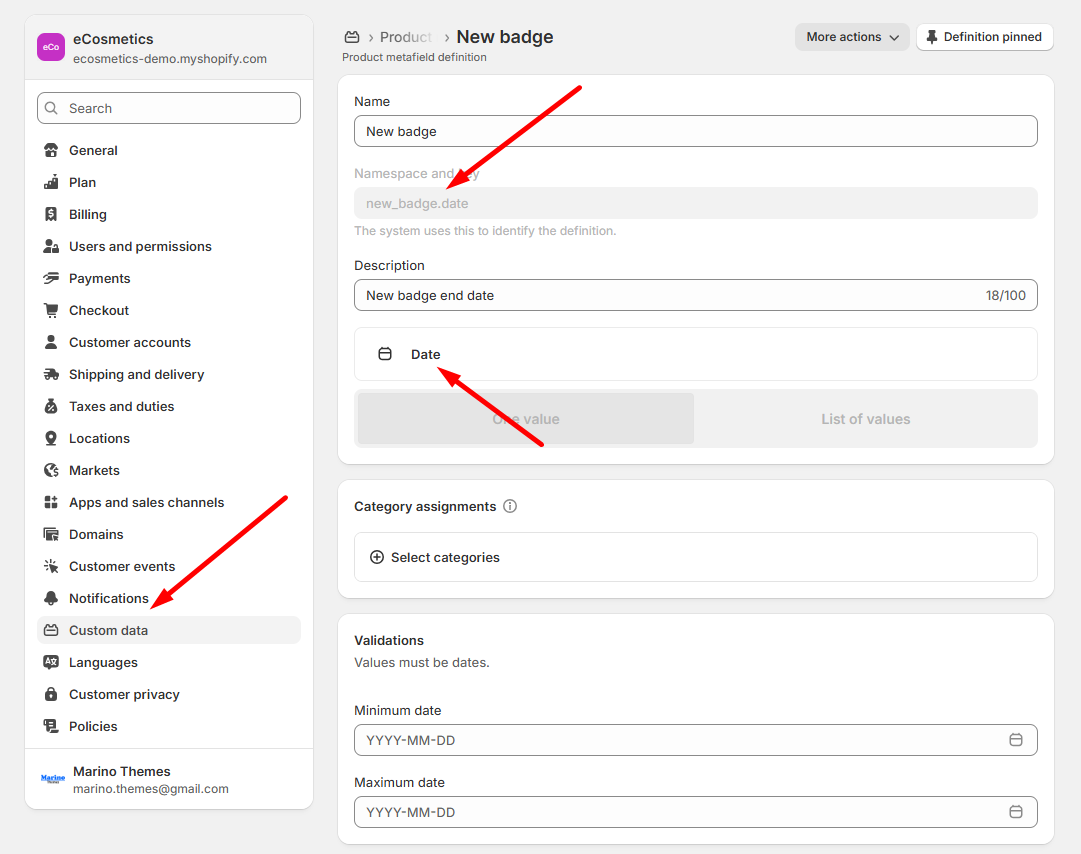
    • From your Shopify admin, go to Settings > Metafields
    • In the Manage metafields section, select the Product
    • Click Add metafield definition
    • Use this code in the Namespace and key field
      Copy

      Metafield
    • Slect content type Date
    • Click Save
  • Adding Metafield value in the selected Product

    • From your Shopify admin, go to Product
    • Select the Product which displying the Metafields
    • After that, get metafield option to add value

      Metafield
    • Set the product new ending date

Collections (#)

You can group your products into collections to make it easier for customers to find them by category.

Multi-Currency (#)

Color (#)

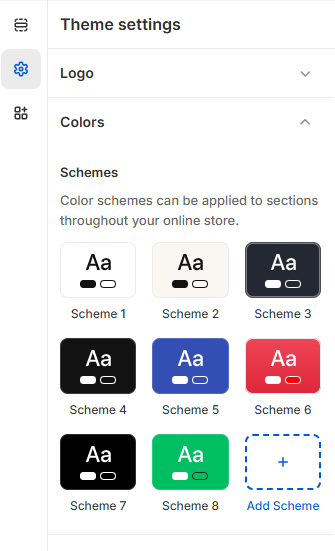
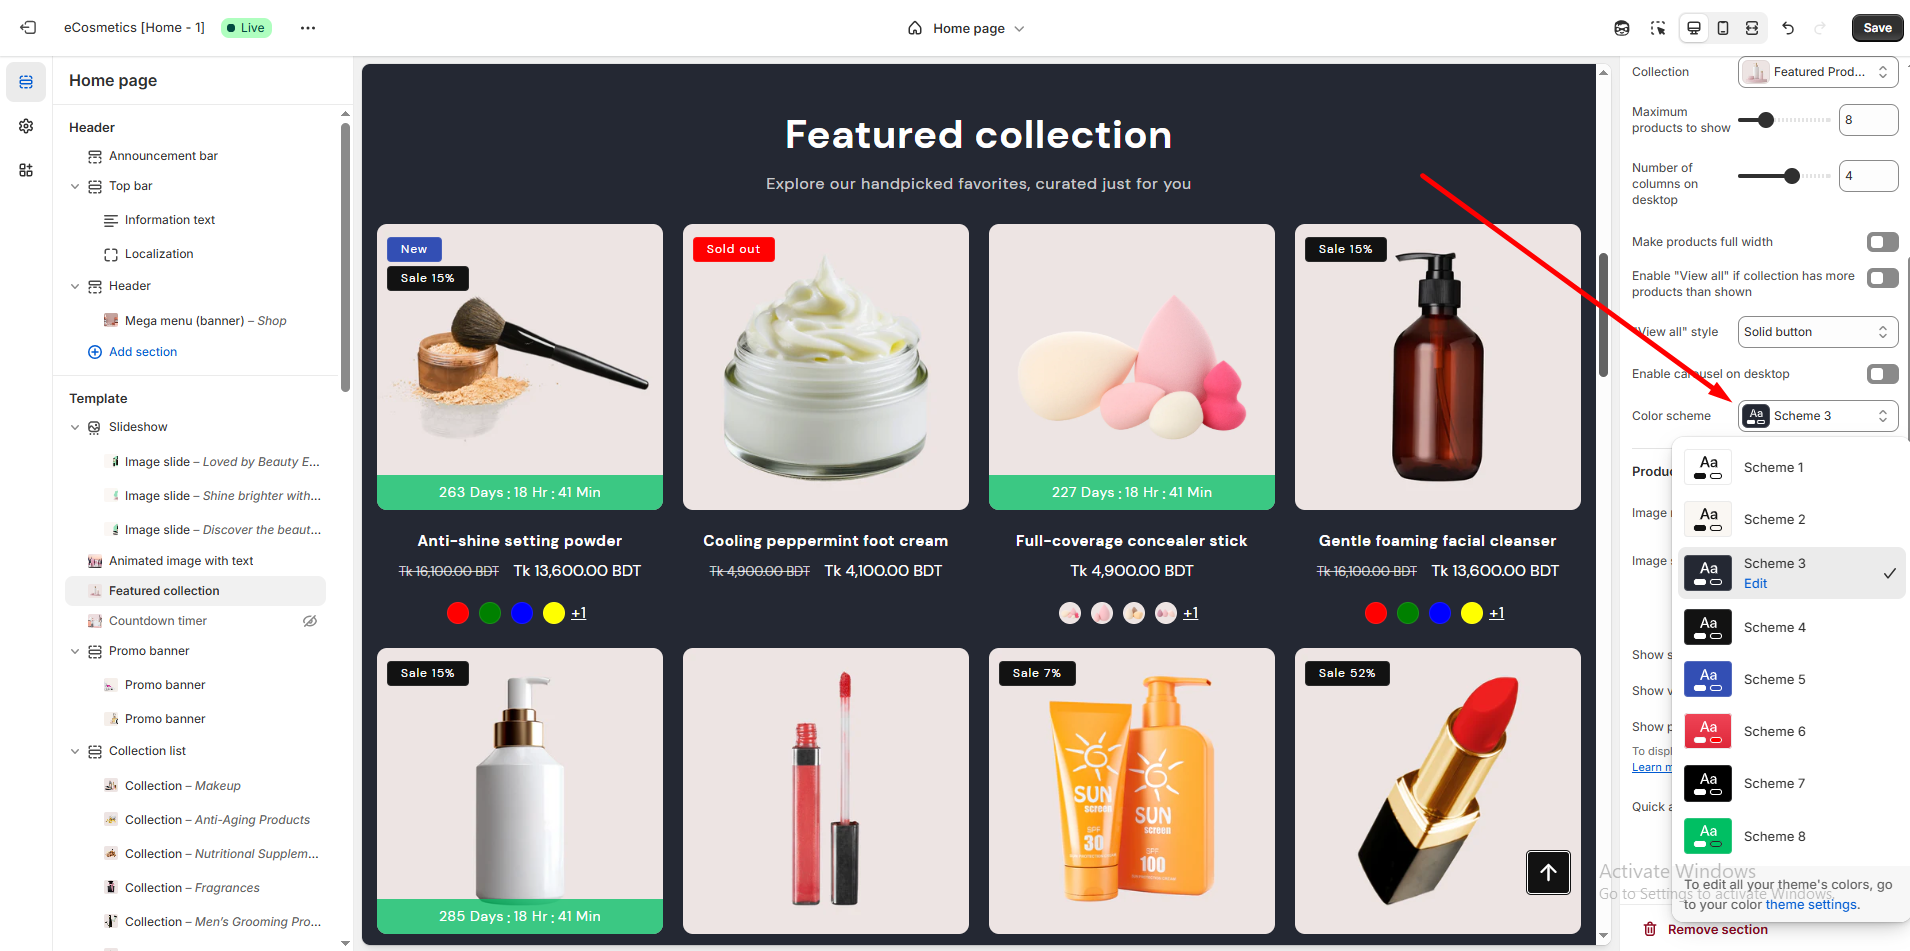
  • From your Store Customizer, go to Theme Settings > Colors
  • Modify or add a color scheme—each section includes an option to customize the color scheme.

    Theme Settings
    Theme Settings

Typography (#)

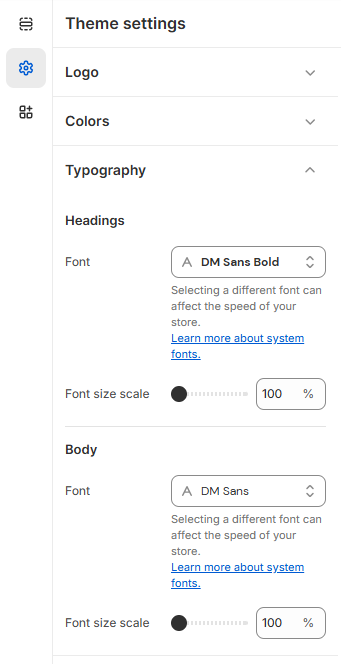
  • From your Store Customizer, go to Theme Settings > Typography

  • Theme Settings

Product Settings (#)

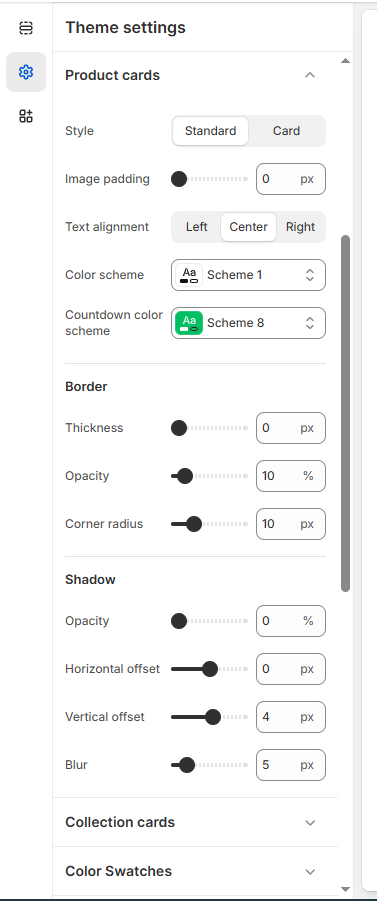
  • From your Store Customizer, go to Theme Settings > Product cards
  • This section includes global product settings along with detailed instructions.

  • Theme Settings

Pages (#)

If you have a Shopify online store, then you can create webpages in your Shopify admin. Webpages contain information that rarely changes or that customers will reference often.

Collections (#)

  • Go to Online Store > Collections > Default collection
  • You can control Sidebar position (left, right, remove)
  • Add & remove, drag & drop block types like Search, Category, Vendor, Type, Color, Size, Collection, Tag, Menu, and Banner in the Sidebar
  • You can controll product column and limit also

Product (#)

  • Go to Online Store > Products > Default collection
  • Add & remove, drag & drop block types like App, Title, Price, Description, Countdown, Variant, Action Button, Share & Payment in the Prodcut Section
  • Add & remove, drag & drop block types like Description, Review, Custom Tab, Unique Tab
  • You can controll Related Product also

Blogs (#)

  • Go to Online Store > Blogs > Default collection
  • You can control Sidebar position (left, right, remove)
  • Add & remove, drag & drop block types like Search, Recent Post, Archive, Social Media, Tag, Menu, and Banner in the Sidebar
  • You can controll blog column and limit also

Article (Single Blog) (#)

  • Go to Online Store > Blog posts > Default blog post
  • You can control Sidebar position (left, right, remove)
  • Add & remove, drag & drop block types like Search, Recent Post, Archive, Social Media, Tag, Menu, and Banner in the Sidebar
  • You can controll blog form also

404 Page (#)

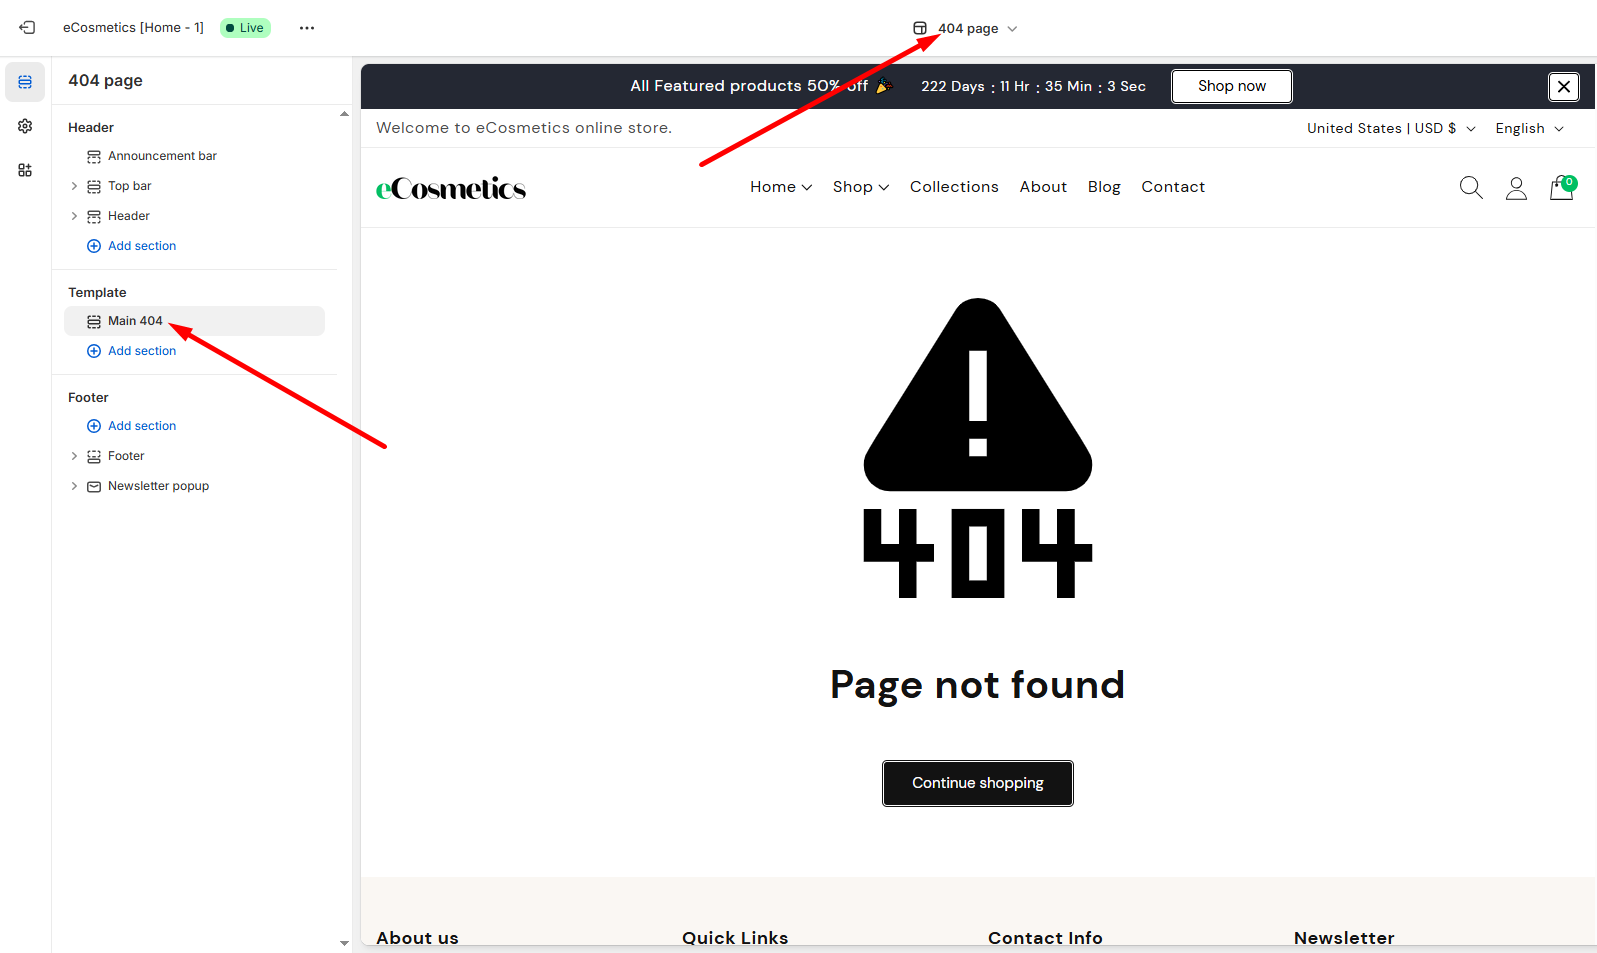
  • Go to Customizer > Others > 404 page

    404 Pages

Password Page (#)

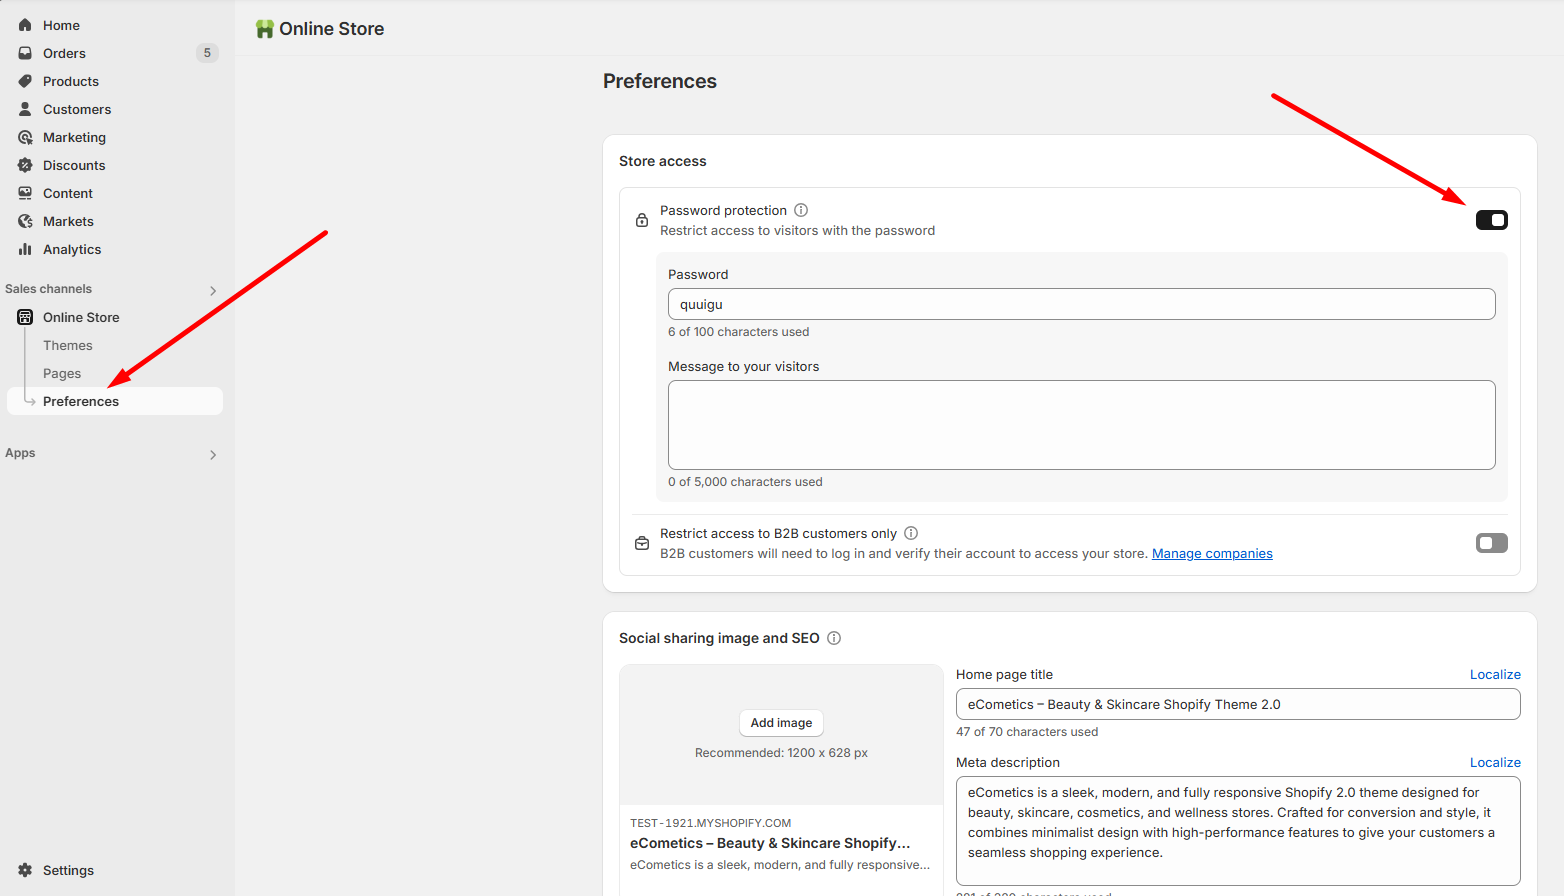
  • From your Shopify admin, go to Online Store > Preferences
  • Scroll to the Password protection area, and check Enable password
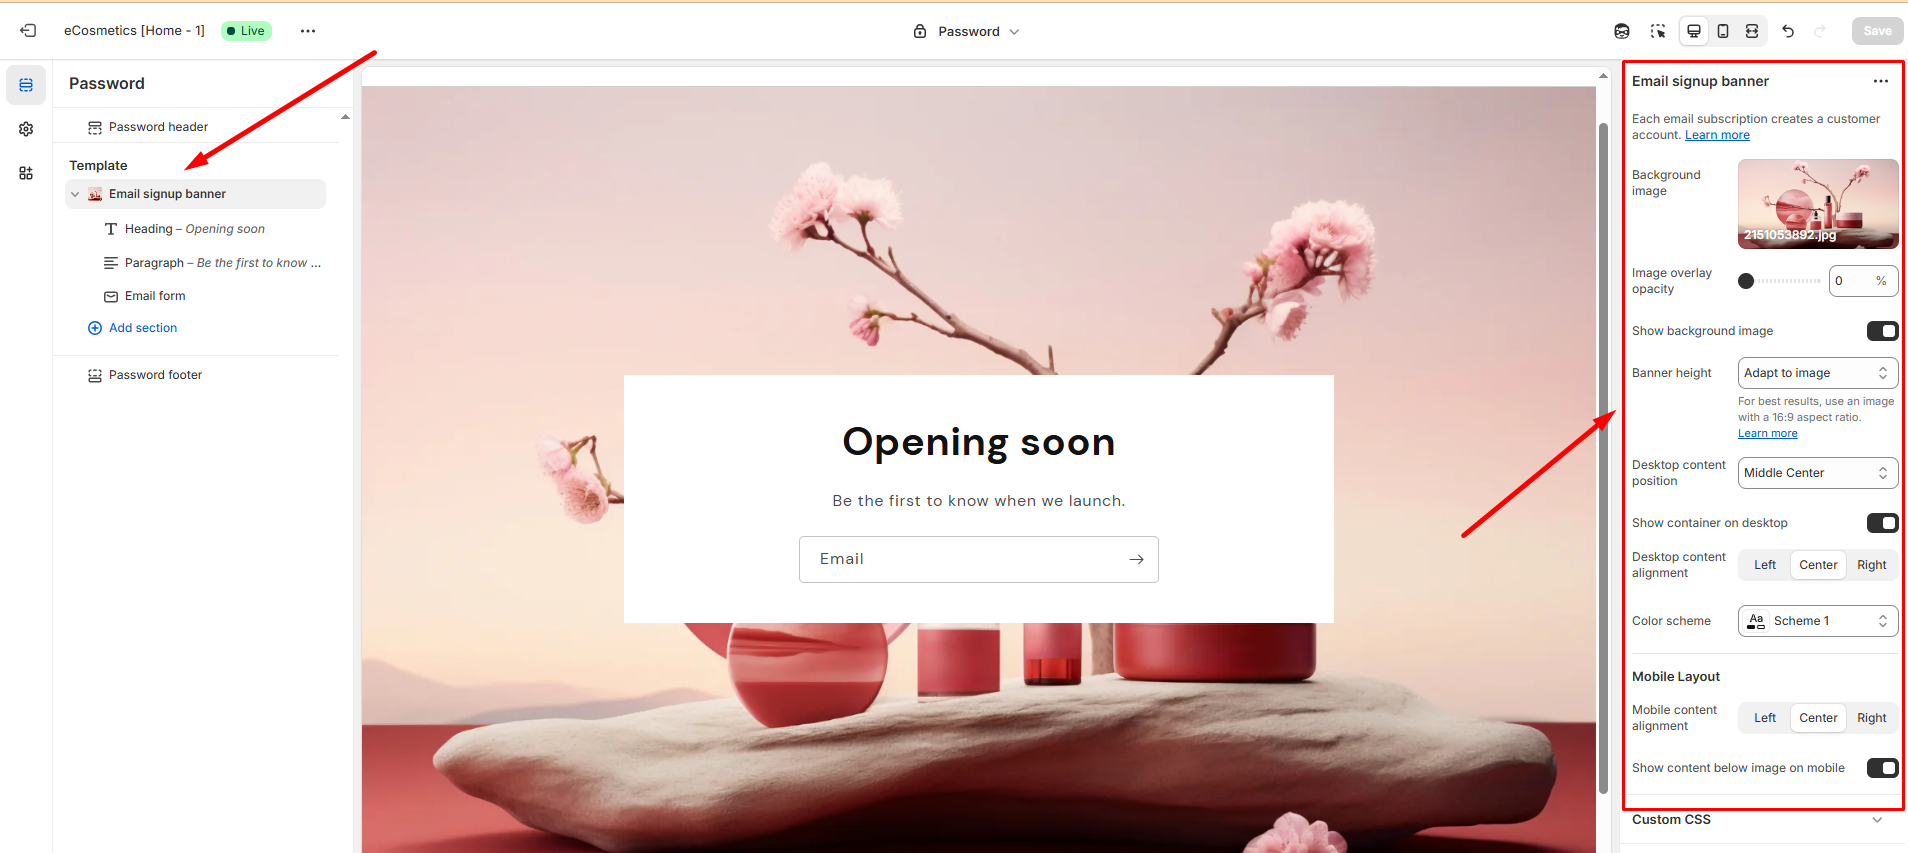
  • Go to Customizer > Others > Password
  • You can add, remove, edit, and customize sections using the theme editor

    Password Pages Password Pages

Newsletter Popup (#)

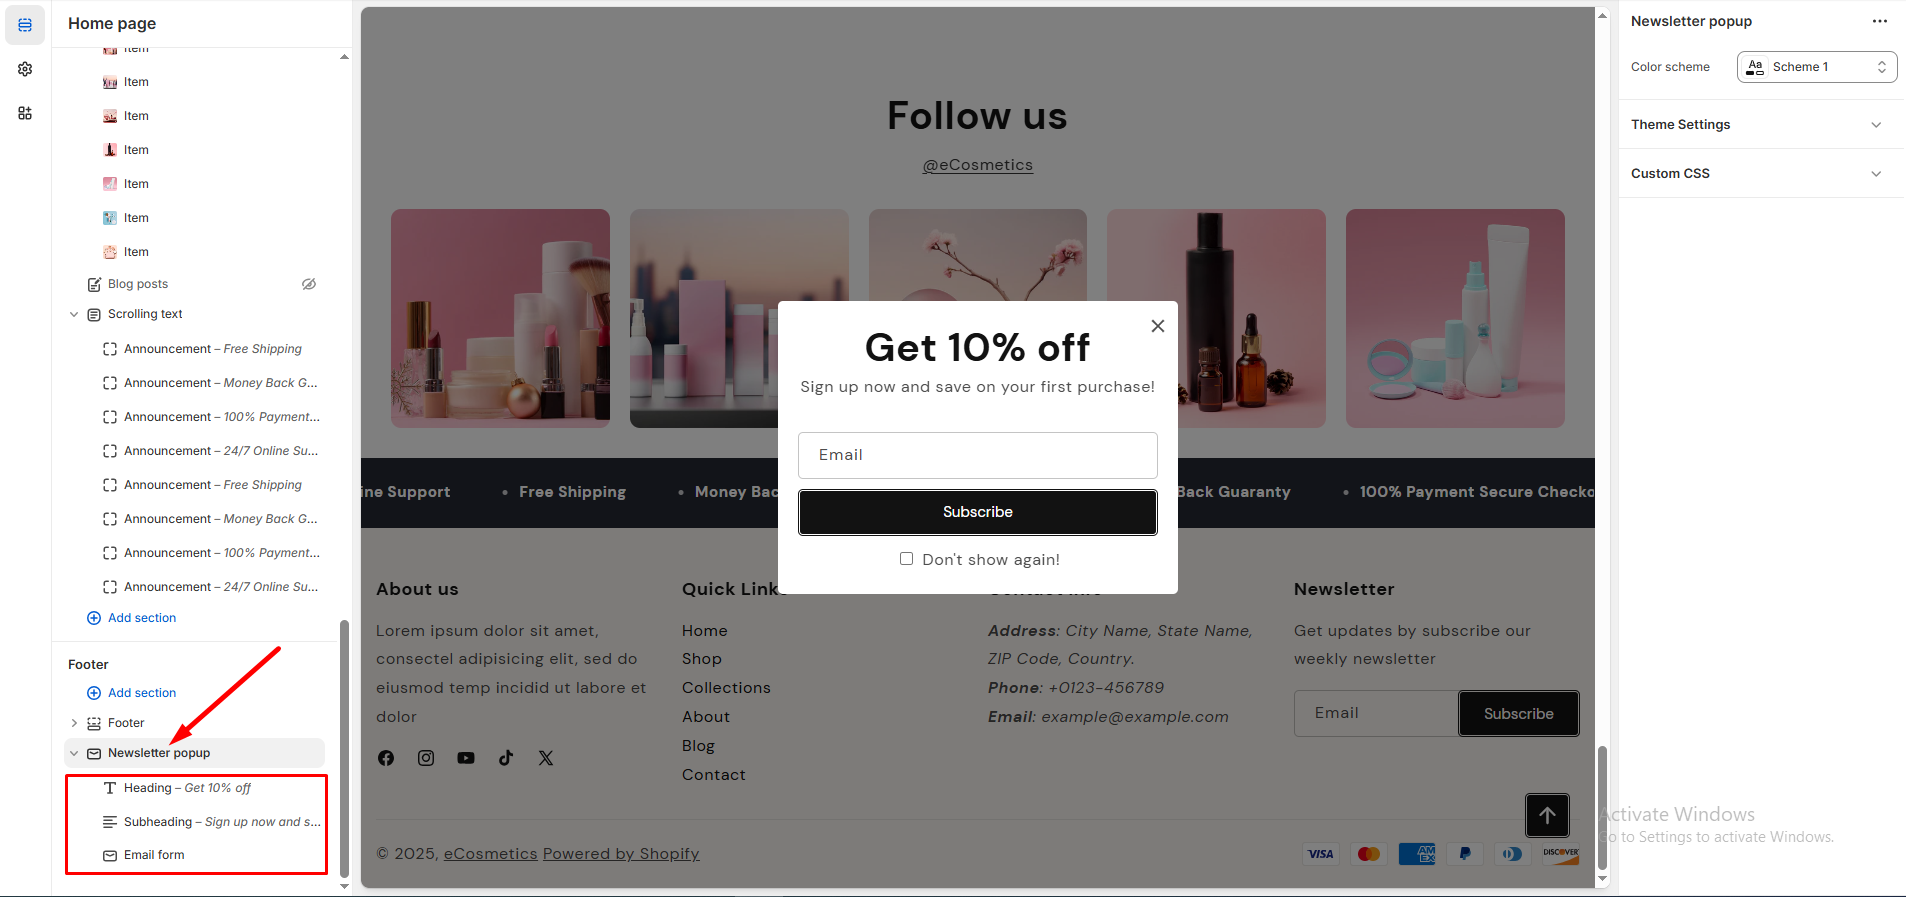
  • From your Store Customizer > Newsletter Popup

  • Theme Settings

Support (#)

Thanks for purchasing our theme. A 24/7 support system is available.

Changelog - v1.1.3 (#)

  • #072 Fixed: Mobile menu cart URL issue. It was a static URL, now modified to a dynamic(Routs) URL.
  • #073 Fixed: Service Image (Portfolio) section image popup issue. The popup image did not display perfectly, now it has been fixed.
  • #074 Improved: Product Recommendations section functionality. Now added "Product Recommendations" updated functionality.

Changelog - v1.0.0 (#)

Initial Release on 29 May 2025